Wondering how to use MailChimp to double your revenue?
MailChimp is probably the best-known player in the email automation game. But even those with years of experience with the platform probably don’t realize all the advanced features they’re missing.
In this article, Ignite’s Head of Email Marketing Dustin Baly goes over seven of his favorite hacks for better returns.
What You’ll Learn:
- Pay attention to deliverability
- Send a welcome series
- Build advanced opt-in’s
- Unlock Editor features
- Use animated GIFs(and split test them)
- Connect your account with Domo
- HTML export
In 2019, MailChimp is more than an email service provider (ESP).
The service is now all about the multichannel experience, bringing social media, blog posts, landing pages, signups, and more into the mix. There are even a CRM, reporting tools, and as of this year, a Content Studio that allows you to add GIFs to emails and keep track of your digital assets.
In short—MailChimp is more than email.
In this article, I’ll go over how to use MailChimp to grow your lists, create an email series, and more. I’ll also cover a few things you should know before getting started with the platform.
1. Pay Attention to Deliverability
Deliverability is, of course, the first step in reaching your subscribers. If you can’t gain entry to the inbox, all your email-related efforts go to waste.
Your ESP’s reputation plays a hand in your deliverability rate. As it stands, MailChimp remains in the top-tier here, trailing behind competitors like Drip, ConvertKit, and ActiveCampaign.
MailChimp follows general best practices and includes a few tools that help users stay in compliance with current anti-spam laws.
There’s Omnivore, a built-in automated system designed to prevent abuse. It works by scanning your campaign and analyzing addresses that might hurt your deliverability. This includes spam traps or addresses likely to bounce.
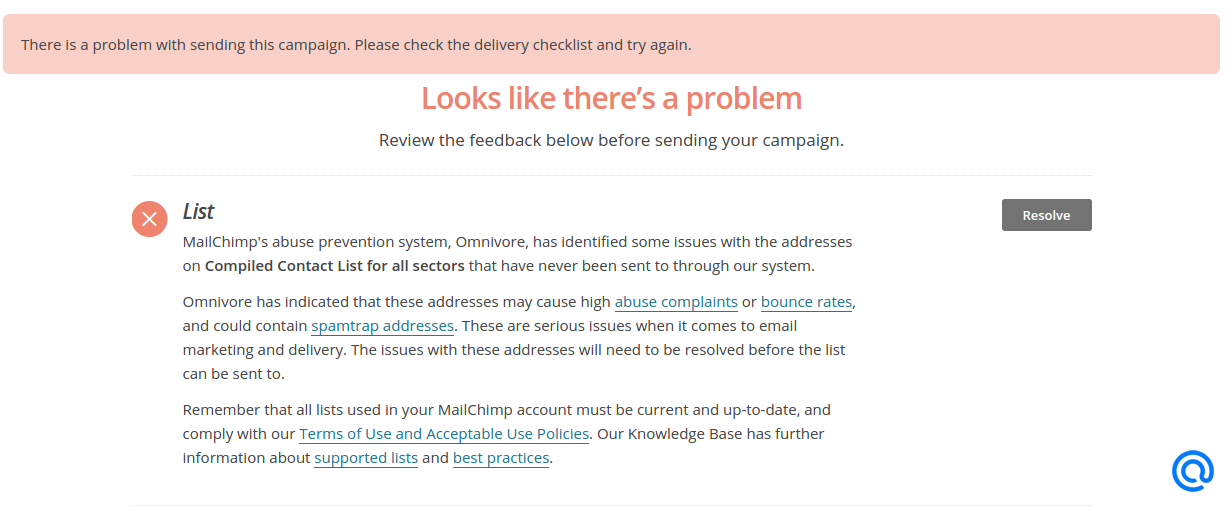
How to useMailChimp: avoid a warning message from Omnivore by adhering to SPAM best practices
If a sender’s IP address sets off too many spam triggers, the receiving servers will route them to spam. Or worse, use firewalls to prevent them from reaching the inbox at all.
Generally speaking, your campaign would need to set off multiple triggers (think bad subject lines, spam trigger words) to end up in this situation.
MailChimp Won’t Protect You Against Bad Practices
Keep in mind, MailChimp (or any other ESP) can only do so much for deliverability rates.
A reputable ESP essentially means that you’re working off of a clean slate–any red flags are on you. This means you’ll still need to take the time to unsubscribe inactive contacts, use double opt-in consent, and refrain from purchasing lists from third-party sellers.
Keep Contacts Organized with One Master List
MailChimp treats all audiences as separate lists. They’ll charge you for the number of contacts across all audiences—and won’t pick up on duplicates if they’re part of two or more audiences.
Instead, they recommend maintaining one master audience list and using groups, tags, and segments to break your subscribers into different groups. This way, it’s easier to keep your list clean and view your data in one central location.
2. How to Use MailChimp to Create a Welcome Series
Whether you’d like to nurture new leads toward making a purchase or guide new users through a series of set-up steps, MailChimp’s autoresponder allows you to always send the right message at the right time.
Users can set up custom sequences that automatically trigger specific emails based on rules and actions.
Here are some examples of automation sequences you might set up using MailChimp:
- Welcome email series to greet new subscribers.
- Content upgrades—think email courses, e-books, checklists, and white papers.
- Automated responses for people requesting pricing from your site.
- Educational content or an onboarding series aimed at showing users around your site or how to use certain features.
The platform can help you create a great welcome email that right off the bat, generates a lot of clicks and helps ensure future emails make it to the right inbox, every time.
Here, I’ll walk you through how to set up a few indispensable email templates – welcome email included. Keep in mind, many of these steps can be applied to any sequence based on a series of triggers and actions.
- Launch the automation builder and select Welcome Message.
- Name your campaign and select a list from the drop down menu.
- Click begin. Keep in mind, MailChimp preloads your automation content, so you’ll need to design and save the template ahead of time.
- Review the automation and schedule if everything looks good.
- If you’d like to add more emails to make this a welcome series, click advanced settings.
- You’ll add email content for each message you’d like to add to your workflow.
- Then you’ll edit the triggers, segment, and scheduling settings for each email in the series.
- Edit your workflow settings and save your work.
- If it looks good, confirm and schedule.
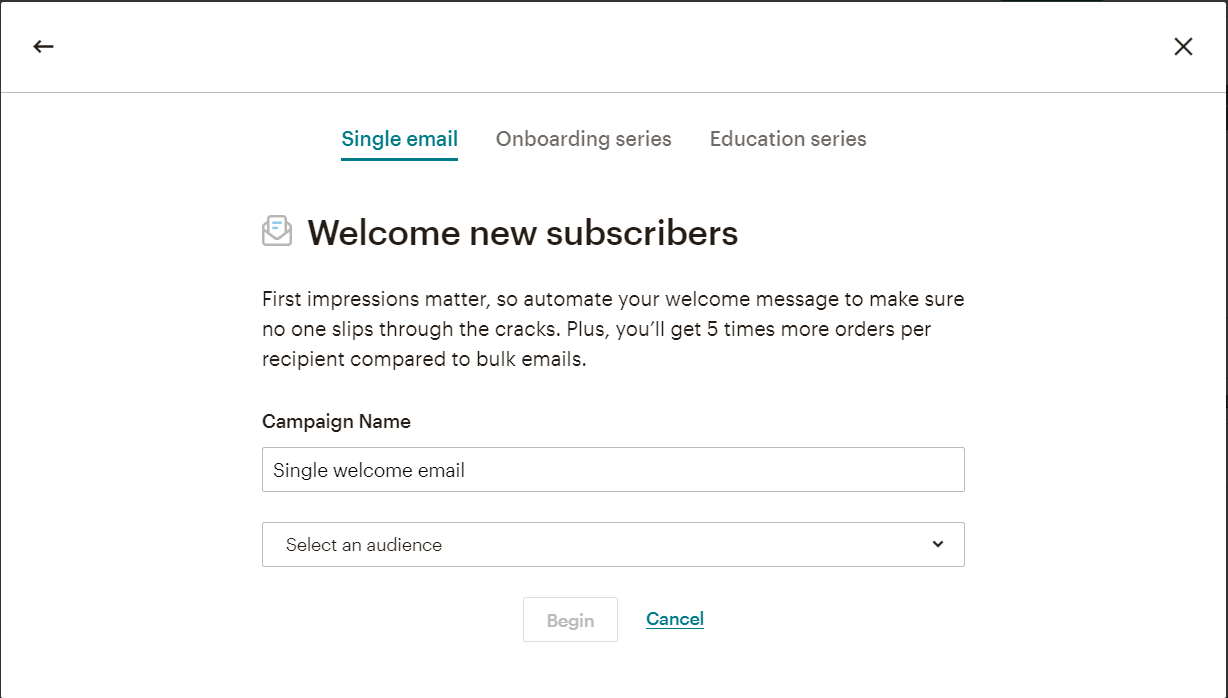
How to Use MailChimp: use its Automation builder to send a Welcome email
MailChimp’s automation builder walks you through each step, essentially following a template. All you’ll need to do is create the emails in this series, then apply triggers that control who gets what email.
Here’s a list of your trigger options:
- Featured: Recommendations from MailChimp based on your account activity.
- Tags: Automation that sends when you add a specific tag to a contact.
- Subscriber Activity: Automations that send based on signups and changes in audience data.
- E-Commerce: Automations triggered by purchase activity in your online store.
- Date-Based: Automations triggered based on a calendar date. You might use this to send out birthday promotions, let someone know their free trial is about to expire, or re-engage inactive prospects after an appropriate amount of time has passed.
- API: Automations that send based on an API call.
- Custom: If the workflow you’re thinking of doesn’t quite fit into MailChimp’s templated automation categories, you can build your own based on custom rules.
Per MailChimp’s Help Section, here are a few things you should know about automations before getting started:
Automations don’t come with every plan. To access all automation features, you’ll need to pay for the Standard or Pro plan. Single automation—meaning you can pre-schedule one email at a time—is available for all plans.
They also mention that different types of automations are structured slightly differently. We just went over the steps for creating a welcome series, but you’ll want to look at their help center docs for info on setting up additional automations.
These include sequences for abandoned cart emails, order notifications, date-based automation, or retargeting campaigns.
3. How to Use MailChimp to Grow Your Email List
Since MailChimp’s big pivot from ESP to all-around marketing platform, they’ve added some new tools that can help you grow your list from paid social ads to lookalike audiences and custom opt-in settings.
Qualify Subscribers with a Lead Magnet
It might feel good initially to get the most leads possible from one campaign, but more leads isn’t always a good thing. You want to make sure you present an offer that speaks to your target audience.
Meaning, you shouldn’t be promoting something that anyone might like such as a new iPad or a free trip to Hawaii.
Instead, use MailChimp’s landing page builder to promote offers that represent your unique value proposition and promote your page through organic and paid social posts, Google ads, and more.
As mentioned in the previous section, you can use MailChimp’s automations to deliver your lead magnet. So, if someone signs up for an email course, they’ll receive a series of perfectly-timed deliveries.
Add Double Opt-Ins to Your Forms
Use opt-in forms on your site to collect email addresses and names. Create your own using MailChimp’s form builder, which you can find under the Audience dashboard.
Choose sign-up forms from the drop-down menu on the left side of the screen.
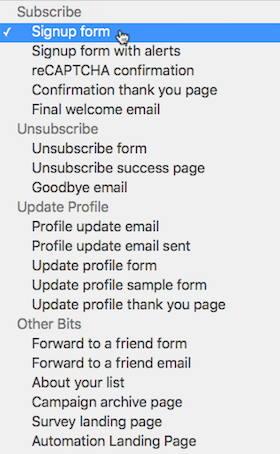
How to use MailChimp: create double opt-in sign up forms
Here, you’ll be able to add things like reCATPCHA confirmations, unsubscribe forms, and thank you pages. To enable double opt-in, head over to Opt-In Settings and make sure to check the box.
While double opt-ins won’t necessarily attract new subscribers, they do help ensure that you collect real emails from people that want to receive messages from you.
Fine-Tune Your Campaigns Based on Data
MailChimp offers reports that let you know which landing pages, emails, and social campaigns work best for your audiences. Look toward your Audience Dashboard for insights like which campaigns drove the most growth or where most contacts are coming from.
You can also get reports that track what content resonates with different segments and use those insights to inform your next campaign.
4. MailChimp’s Content Studio Provides More Control Over Your Brand Aesthetic
MailChimp’s editing features get better with each pricing tier. We recommend getting the Standard or the Pro plan ($14.99+ and $299 per month, respectively) for the “full experience.”
The lower-priced plans, unfortunately, don’t allow for full customization, providing a limited number of templates and lack of control over your brand’s aesthetic.
The MailChimp Content Studio allows you to upload or sync all digital assets, pulling them into a central location for easy access. Everyone with access to your company account will have access to the content library, making it easy to maintain consistency across social posts, emails, landing pages and more.
Assets include things like product images, copy, logos, and other branding elements you might need to pull up when designing a campaign.
The idea is, you don’t need to go looking for the latest version of your graphics every time you need to build a new piece of content.
What’s more, users can connect their store/website and social channels so that you can add product images, files, and more to multichannel campaigns.
5. How to Use MailChimp to Add GIFs to Emails and Landing Pages
One of MailChimp’s best-known features is its signature WYSIWYG drag-and-drop editor. Users have the option to choose from MailChimp’s pre-set templates or code their own.
Today’s consumers look for interactive, user-friendly pages—in other words, there needs to be a reason for them to stay.
One way to generate more interest both on your landing pages and in your emails is to swap out static images in favor of an animated GIF.
Use MailChimp’s tools to create animated GIFs that help you show what your product does, as opposed to explaining the same concept in multiple paragraphs.
Or, try using GIFs on Instagram to capture followers’ attention or in a Facebook ad to send leads to your Messenger bot, where you can collect their contact information to add to your database.
How to Insert a GIF into a MailChimp Campaign
MailChimp recommends against editing GIFs inside the Content Studio, as the final result might not display correctly. Instead, you’ll need to add your files to a content block.
Inside your Campaign Builder, you’ll have your choice of a few different content blocks that support GIFs–image, image card, image group, and image + caption.
- To insert a GIF, click Edit Design in the content section of the Campaign Builder.
- Click the image content block or drag-and-drop an image into the layout.
- Then, inside the editing window, select Browse or Replace to change the placeholder image.
- Select Giphy from the drop-down and search for the GIF you’d like to use.
- Click Insert to add to the content block, then save and close.
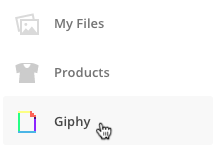
Select Giphy from the image dropdown to insert a GIF
A Quick Note About Using GIFs in Email
Adding GIFs to emails is easy and offers many of the benefits you’d get from using video, without the time investment and large file sizes that come with the territory.
That said, not every email client supports GIFs. Litmus offers a whole guide to animated GIFs in emails, which is worth checking out if you’re new to the idea.
Want Proof that GIFs are a Powerful Asset for Marketers? Test ’em.
Stats from all over the web back up the use of GIFs in your marketing materials.
Still, you might need to make a case for moving pics for a client or a boss that just “doesn’t get it.”
MailChimp allows you to set up A/B campaigns to test different templates. Consider testing GIFs against their static counterparts to see what works best.
6. Use MailChimp with Domo for Better Reporting
It’s worth pointing out that MailChimp offers a pretty robust solution when it comes to reporting.
The list of reports inside the platform requires a couple of scrolls to get through the whole thing, and users can review everything from email stats to revenue and subscriber activity.
MailChimp also integrates with your Google Analytics account, allowing you to pull even more data into your account.
Still, some users have reported that even with all of the new updates, MailChimp’s reporting dashboard is a bit too simplistic.
Despite its 18-page integration roster, MailChimp doesn’t allow you to review data, at a glance, from all key sources at once.
With that in mind, I’d recommend using a business intelligence tool like Domo. The platform connects to MailChimp’s within minutes and allows you to combine data from MailChimp with other sources.
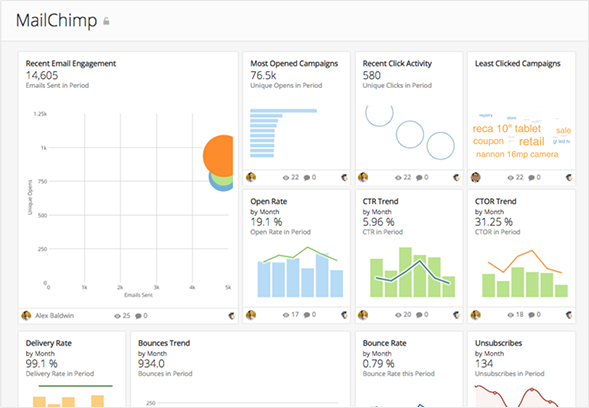
How to use MailChimp: connect it with Domo for access to more in-depth reports
According to PC Mag, Domo has a somewhat steep learning curve. But once you get the hang of it, it proves to be a great way to manage your data–pulling in info from CRMs, ERPs, accounting tools, review sites, and more.
Connecting MailChimp and Domo comes with a few key benefits. As per the Domo site, here are a few ways these two tools can come together for powerful insights.
- Monitoring and tracking campaign performance
- Collecting feedback to inform future campaigns
- Learn more about your target audiences
- Review subscriber behavior and stats
What Kind of Reports Will You Get?
Inside your MailChimp account, you can track opens, sends, and even the ROI of your campaigns. All of this info is useful and easy to understand.
Additionally, you can track campaign performance against actual sales and see who made a purchase after engaging with an email, landing page, or social post.
The point is, MailChimp’s reports are great if you’re planning on reviewing marketing by itself.
But Domo provides a deeper dive into how your marketing efforts fit in with the big picture.
For example, you can use it to qualify leads and organize them based on conversion rates. You can see where leads are coming from and gain an understanding of which channels deliver the highest ROI.
You might also use it to learn how when users engage with your content or how many touchpoints it takes to convert a lead.
7. How to Export HTML
The beauty of MailChimp and similar platforms is that you can build professional-looking emails, landing pages, and other marketing collateral without any coding know-how.
But, a lot of users don’t realize that they can take their MailChimp creations outside of the platform to edit elsewhere or give to another user.
To do so, follow these steps:
- Head over to your Templates page.
- Find the template you’d like to export by browsing through the template list or using the search function.
- Then, click the drag-and-drop menu, located next to the Edit button and click, export as HTML.
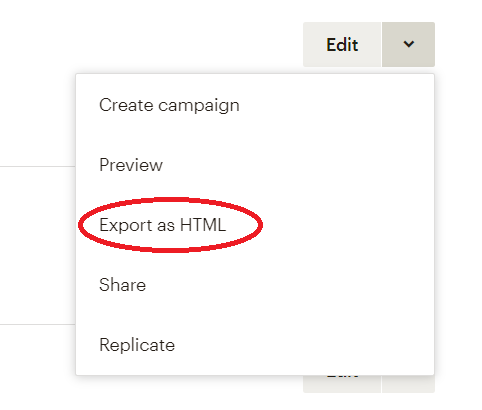
How to use MailChimp: export as HTML to save a template outside of MailChimp
From there, your file will save to your computer as an HTML file, which you can edit in your HTML editor of choice.
An exported HTML file won’t retain the drag-and-drop functionality. Meaning, if you need to make changes, you’ll need to update the code manually.
To keep the drag-and-drop in play, you can use the template sharing feature, which allows you to share a template with another user via email or using a unique URL that allows them to access the file.
Wrapping Up How to Use MailChimp
MailChimp’s expansion seems like a natural progression for the platform, as today’s customers seek out marketing platforms that help them reach customers across all channels.
That said, these new features feel familiar. It doesn’t matter if you’re creating email templates, social posts, or landing pages, the set-up process is more or less the same.
Bottom line; MailChimp’s latest updates prove there’s more to explore. I’m curious to see what features roll out next and the marketing hacks they bring to the table.
