Want to learn how to live stream on Facebook like a pro?
Good news, in this article we will tell you how.

How to Live Stream on Facebook
What is Facebook Live? How To Live Stream On Facebook
At its core, Facebook Live is a feature that allows Facebook users the ability to live stream videos in real time.
Live streaming, for those unfamiliar, is the ability to “transmit or receive live video and audio coverage of (an event) over the internet.”
It differs from your usual video because instead of pre-recording and uploading to the platform, you simply hit the live stream button from your smartphone and begin recording. As you film, your video will broadcast to anyone tuned in.
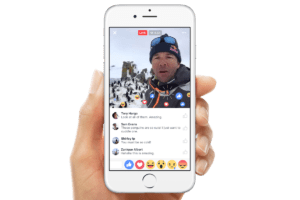
Live Stream an Event
Live videos can last up to 4 hours. Once you’ve finished your video, hit the finish button and it will be added to your timeline.
The live stream craze began with smaller social media apps like Periscope and Meerkat. Its popularity quickly caught Facebook’s attention, leading the platform to unveil Facebook Live in April 2016.
Why Should Businesses Live Stream on Facebook?
Over its relatively short shelf life, Facebook Live has had a major impact.
Wrap your head around these for a second:
-
“Facebook Live Stream” search popularity has risen vver 330% since Facebook Live’s rollout
-
Facebook Live videos are watched 3x longer than videos that aren’t live
-
Users comment on Facebook Live videos at 10x the rate of regular videos
-
Daily watch time for Facebook Live broadcasts has grown by more than 4x
-
1 in every 5 Facebook videos is a live broadcast
These (extremely impressive) numbers aside, live streaming represents an incredible opportunity for brands.
First and foremost, your followers like it. As evidenced by the engagement rate listed above (10x more comments than regular videos!), it’s a feature most brands simply can’t afford to ignore.
Over the past few years, Facebook has made it increasingly difficult to reach fans organically. In turn, engagement rates on most business pages have suffered significantly. But thanks to live streaming, brands have been able to reclaim some of that lost engagement.
People are notified when a brand they follow is streaming a video, as well as when a friend is tuned into a live stream. They can join at any time during the live stream, and comment as they please.
Beyond that, Facebook itself favors live video. The platform is known for its frequent algorithm updates, and its latest favors video (especially Live video) over other types of content, making it more likely to appear in user’s newsfeeds. So if reaching your hard-earned followers is part of your strategy, Facebook Live should be too.
Luckily, Facebook Live is simple to set up and use, making it easy for any brand to experiment with.
How to Live Stream on Facebook Set Up
With Facebook Live, you can stream from either your mobile device or desktop computer.
First, we’ll cover mobile.
Step 1: Go to your newsfeed and tap the Live icon on the far left.

How to Live Stream on Facebook – Select the Live Icon
Step 2: When prompted, give Facebook access to your camera and microphone (only for first-time use.)
Step 3: Choose who can see your video. You can choose to broadcast to “Public,” “Friends,” or a custom list of specific followers. Businesses will likely want to choose Public, unless your video is meant for a very specific segment of your audience.
You also have the option to broadcast to “Only Me.” Normally, not the best option, but can be a good way to test out content and get the hang of broadcasting live.
Step 4: Write a description. This will tell your viewers exactly what your video is about and appear as a status update with your video. Make it interesting, catchy, and to the point.
Step 5: Add additional settings. Under the description box, you’ll see an icon to tag friends, add a location or add an activity.
Also, look at the top right corner to choose your camera view. You can set it up to film forward or self-facing (selfie view). You can also choose to film horizontally or vertically.
Step 6: Add filters, etc. to your video. Here, you can choose from Facebook’s filters, emojis, write or draw on your video screen by tapping the magic wand icon in the upper right corner.
Step 7: Go Live! Hit the blue live button, and you’re ready to go. Once clicked, you’ll have a 3-second countdown until your live stream officially starts.
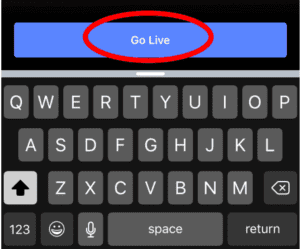
How to Live Stream on Facebook
As you broadcast, your video will appear in your follower’s newsfeeds, and they’ll be sent a notification to let them know you’ve gone live. They will be able to comment and engage in real time as your video streams.
If you encounter any unpleasant comments, you can choose to block a user by tapping the photo next to their name and selecting Block.
When you’re done with your video, hit the Finish button. A screen will appear asking if you want to post the replay (you do) and give you the option to download it for future use.
You can also choose to live stream from your desktop. The process is similar to that of a mobile stream.
This time, you’ll stream directly from your Facebook Business Page. Open up your page, click in the Write Something box and select See All. Then, select Start a Live Video.
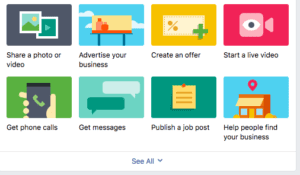
Live Stream an Event – Select Start a Live Video
Next, you’ll write your description and give Facebook permission to use your computer’s camera and microphone.
If you would like to share a video from a different device, you’ll have the option to set up that connection as well.
Then, simply hit the “Go Live” button to start your broadcast.
How to Live Stream on Facebook – Tips for Use
As usual, Facebook has multiple resources available to help guide you through the live stream process.
Particularly helpful are its many tips on the subject, including the following:
- Tell fans when you’re broadcasting ahead of time – Build anticipation (and a bigger audience) by announcing your broadcast before it goes live. Facebook recommends giving one days notice
- Go live when you have a strong connection – Nothing will kill your live stream faster than a poor connection. If you can, connect to the nearest WiFi. If not, make sure you can find at least a 4G connection. When in doubt, check the Go Live button – it will be grayed out when your connection is weak.
- Write a catchy description before you go live – make sure it a.) captures attention and b.) properly explains what your video is about
- Ask viewers to subscribe to Live notifications – As viewers watch your video, they can hit the Follow button in order to receive notifications the next time you’re live. Encourage your audience to do so!
- Address commenters by name and respond to their comments live – Personalization goes a long way and will help form a connection with your audience
- Broadcast for long periods of time to reach as many viewers as possible – the longer you’re live, the longer people have to discover and share your video. Facebook recommends broadcasting for at least ten minutes
- Signal the end of a broadcast – Don’t leave viewers hanging; let them know your broadcast is over by telling them so
Naturally, Facebook’s the expert here, so I’d definitely recommend following the advice above. Here are few more tips to add to the list:
- Make an introduction (multiple times) – it’s customary to introduce yourself at the beginning of a video, but remember, live streaming means new viewers could be tuning in at any time. Make it a point to reintroduce yourself every few minutes to anyone new (you’ll be able to see who tunes in as you broadcast)
- Practice with the Only Me setting – If you’ve never live streamed before, try a test run by setting your audience to “only me.” That way, you can get the nerves out and work out any kinks.
- Encourage people to comment and engage – Live videos, by nature, are more interactive. They’re more conversational, so encourage your viewers to take part. Ask if they have any questions, and respond in real time.
- Upload thumbnails to go with your video – once the video is done, you’ll want to share it to your timeline. Facebook allows you to include up to 10 thumbnails to go with it – and as we all know, posts with visuals perform better. Make sure you include a relevant thumbnail to go with it.
- Share your video to your other social channels – when you’re done, you can download your video URL by clicking on the title, right clicking on the video and selecting Show Video URL. Share it to your other accounts, email, blog, etc. to get as much exposure as possible
How to Live Stream on Facebook – What to Broadcast
Live streaming on Facebook is sounding better and better, right?
The question, of course, is what to stream. And as with all social media channels and strategies, that question is exactly where you start.
What about your business is unique and can be captured in real time? You’ll be surprised at what you can come up with.
- Show a behind-the-scenes look at your company
Broadcasting behind the scenes is a great way to add a human element to your brand. Take them on a tour, introduce them to your products, and to your people.
Or, do what Dunkin’ Donuts did. They brought viewers into their test kitchen to watch the construction of massive cake – made entirely of donuts.

Live Stream an Event – Go Behind the Scenes
- Live stream an event
Live streaming is the perfect medium to showcase any company event or activity. It can be something small – a company kickball tournament, even – or something much bigger. Like, say, the Oscars.
The Academy capitalized on the event and behind the scenes tactics by using Facebook Live to take viewers on a tour of exclusive interviews and guests.
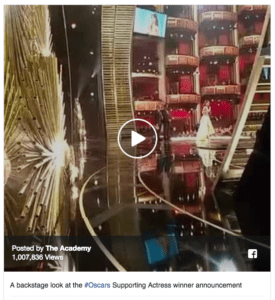
How to Live Stream on Facebook – Live Stream an Event
- Host a How-To
If any of your products warrant a little guidance, Facebook Live is an excellent place to provide it.
Case in point: Benefit cosmetics. They hosted a weekly series that showed their audience how to use different products from their makeup line – and used audience input to do it. In each video, they ask the audience which product they’d like to see in action, and then proceeded to choose a how-to based on the audience input. Customer engagement and a relevant video? Talk about a win/win.

How to Live Stream on Facebook – Publish a How-To
- Live Q&A’s
As we talked about before, live streaming is a great way to get more engagement. And one of the best ways to get more engagement? Ask for it with a Q&A. Get your audience involved by asking them what they want to know, and answering it in your live broadcast.
Andy Murray showcased this after his Wimbledon win – and won over fans in the process.
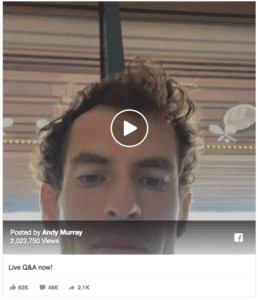
Live Stream an Event – Host a Q&A
How to Measure Your Live Streaming Results
To see how effective your live streaming strategy is, you can navigate to your analytics page.
To do so, go to your Facebook Business Page and click on the Insights tab at the top. When the menu appears, select Video.
You can then go to the Top Videos section and choose a specific video, or scroll through your video library to look at all the videos on your page.
Once you select one, you can access all the key metrics to get a handle on your video’s performance.
These will be similar to the metrics you find on regular Facebook video – video views, audience retention, demographic breakdown, etc.
But with live videos, you get a few extras in the mix. For videos streamed live, you can view the total views, average watch time, and the people reached. For pre-recorded (and later broadcasted) videos, you can analyze the minutes viewed, average % completion, and reactions, comments, and shares.
A few other handy features are:
- Peak concurrent viewers – The highest number of viewers who were watching the video while it was live.
- Viewers During Live Broadcast: A visual representation of the number of viewers during each moment of the live broadcast.
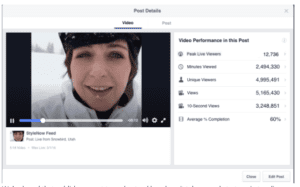
How to Live Stream on Facebook – Measure Analytics
You can also access each metric to see how it changed over the duration of the video, so you’ll have an idea of when (or if) viewers began to drop off, and tweak your content plan accordingly.
As always, you should keep an eye on your analytics over time to make any needed changes, make sure your reaching the right audience, and incorporate what works into your future efforts.
Wrapping Up How to Live Stream on Facebook
Live streaming is the new frontier when it comes to Facebook marketing.
Facebook likes it, users like it, and so far, businesses like it as well.
So if you haven’t already, it’s time to give Facebook Live a try.