Love ‘em or hate ‘em, it’s hard to deny the effectiveness of popups when it comes to online conversions.
In this post, I’ll show you how to set up a popup strategy that gets results.
Watch the Video or Read the Full Article Below
How do Website Popups Influence Conversions?
A lot of people are against popups.
And I get it. To the untrained eye, they come across as more of a nuisance than a tried-and-true conversion tactic.
But here’s what you might not know about popups: they generally drive a .5%-5% click-through rate on a given landing page.
That means that out of every 100 people that visit that particular page, 5 of them will be clicking through to the next step in your process – whether that next step is an email submission, ebook download, webinar sign-up, etc.
And here’s the best part.
Based on that next step and the conversion rate it drives, you can build a business model.
Let’s break that down a little bit.
If, for example, I have 100 people coming to a page and 5 of those people interacting with a popup and clicking through to the next step, I may have a 50% conversion rate on that next page.
That means 2.5 people clicking my popup went from being just another browser on my website to completing the action I wanted them to take; again, whether that be an email submission, download, what have you.
In terms of pushing website visitors through to converters, popups are hard to beat.
How to Create Popups That Get Conversions
All that said, it remains true that sometimes, popups can have the opposite effect.
And because popups do run the risk of being somewhat intrusive and, let’s face it, annoying – it’s extremely important that you approach them the right way.
Here are a few tips I’ve picked up along the way to help make the most of your popups.
-
Format and Timing For Website Popups
First things first, how and when you fire your popup plays a big part in its overall success.
You absolutely do not want a full-page takeover popup.
For starters, it will get you a penalty from Google and could consequentially hurt your rankings.
As of January 10, 2017, Google rolled out its interstitial penalties, which target mobile pages where content is not easily accessible to a user on the transition from the mobile search results may not rank as highly.
Google says that includes “Showing a popup that covers the main content, either immediately after the user navigates to a page from the search results, or while they are looking through the page.”
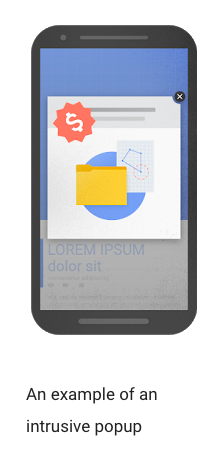
Avoid website popup penalties from Google
If you do run popups on mobile, they should only take up one-third of the screen or less.
Aside from a possible penalty, full-screen takeovers are just kind of rude to your reader.
You’re forcibly disrupting their experience, and it’s no surprise that they have super low conversion rates.
To avoid that, I prefer to use nudge popups.
Nudge popups come from the bottom of the page, giving readers time to register that they’re coming and take a clear look at the CTA.
Of course, these nudge popups have to reach those readers at the right time.
And when it comes to popups, you have plenty of timing options:
(Spoiler alert: I’m a big fan of the scroll popups).
Timed Popups
Timed popups appear after a user has spent a certain amount of time on site.
Depending on the software you use, you can set these to designated increments like 10 seconds, 30 seconds, etc., or some will let you experiment to find the sweet spot (ex. 17 seconds).
These can be effective, but again, I recommend doing a good amount of testing to see which exact time increment drives the best results for your website.

Timed popups fire after a user spends a certain amount of time on site
Scroll Popups
Scroll popups appear after a reader has scrolled down a certain percentage of a page (say, 50%, 70%, etc.)
These are ideal for blog pages, as they make sure a reader is actually invested before firing the popup.
I like these for email signups, ebook downloads, etc. because they catch readers who are engaging with and scrolling through your content. These are the ones most likely to find value in continued communication.
Entry Popups
Entry popups get a bad wrap (but sometimes, it’s for a good reason.)
These are the popups that appear as soon as someone lands on a page, forcing them to interact and make a decision before they get to the actual page content.
They’re super risky, and you can probably see why this kind of popup can up the annoyance factor substantially.
But, when used correctly, these can actually be extremely effective.
The key here is to know what kind of content belongs in an entry popup.
This isn’t the place to put your newsletter subscription or webinar registration.
It is the place to put any super discounts, giveaways, or any other special incentives. It’s even better is this an offer exclusive to your website visitors – make them think they won’t find this 30% anywhere else, and they’ll be more likely to pull the trigger.
For that reason, entry popups are generally more successful with e-commerce businesses.
Exit Intent Popups
These appear as a user is about to exit a page.
Generally, these use exit-tracking software to track mouse activity and deploy a popup when the mouse gets closet to the exit or back button.
These are pretty popular, and be used to recapture the attention of a reader you’re about to lose – if you include the right messaging.
That means a strong CTA, and, if appropriate, an offer that matches the content on the page they’re about to leave.
-
Send Users to a Dedicated Landing Page
Most marketers won’t tell you this one – and that’s because most of them don’t do it.
But here’s the thing about popups: they’re only meant to intrigue and catch enough attention for a click-through. Then, you deliver the real value on the next page.
But all too often, that next page is just a contact page.
Sure, they may sign up, and all’s well. But if they leave, they may be leaving your sales funnel completely.
So instead, I like to use popups to send users to a dedicated landing page. Once there, they’re kicked into a funnel.
For example, if I wanted to put a popup on one of my blogs about PPC, I might put include something about how PPC audits generally save clients thousands of dollars.
That will catch their attention. Then, I need to send them to a landing page with more information on that topic – what our audits entail, our success stories, where they can contact us, etc.
Here’s a great example from Wishpond:
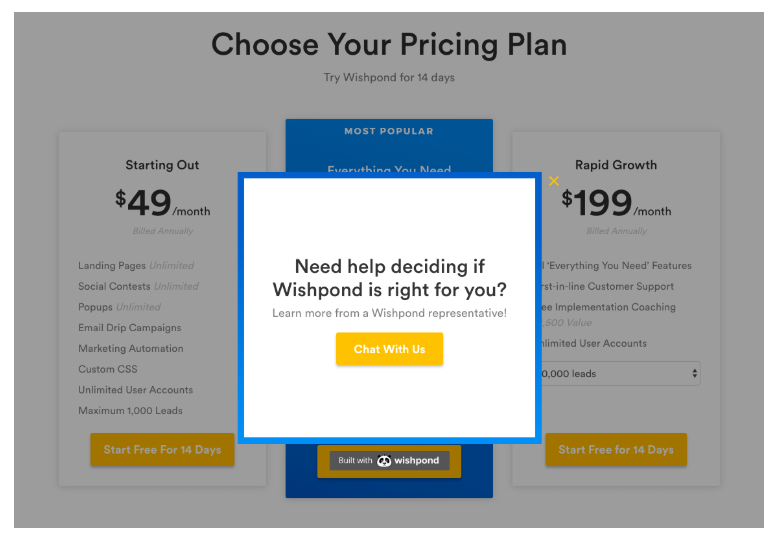
Use exit intent popups like Wishpond
Even though the user made it all the way to the pricing page, they weren’t ready to convert. Instead of losing that lead altogether, they went for a lesser conversion with an exit-intent popup.
When clicked on, it would lead to a landing page where the user could get more information.
To set that up, I’d use a landing page software like Unbounce.
Unbounce features an easy drag-and-drop editor to let you easily create and A/B test a custom landing page.
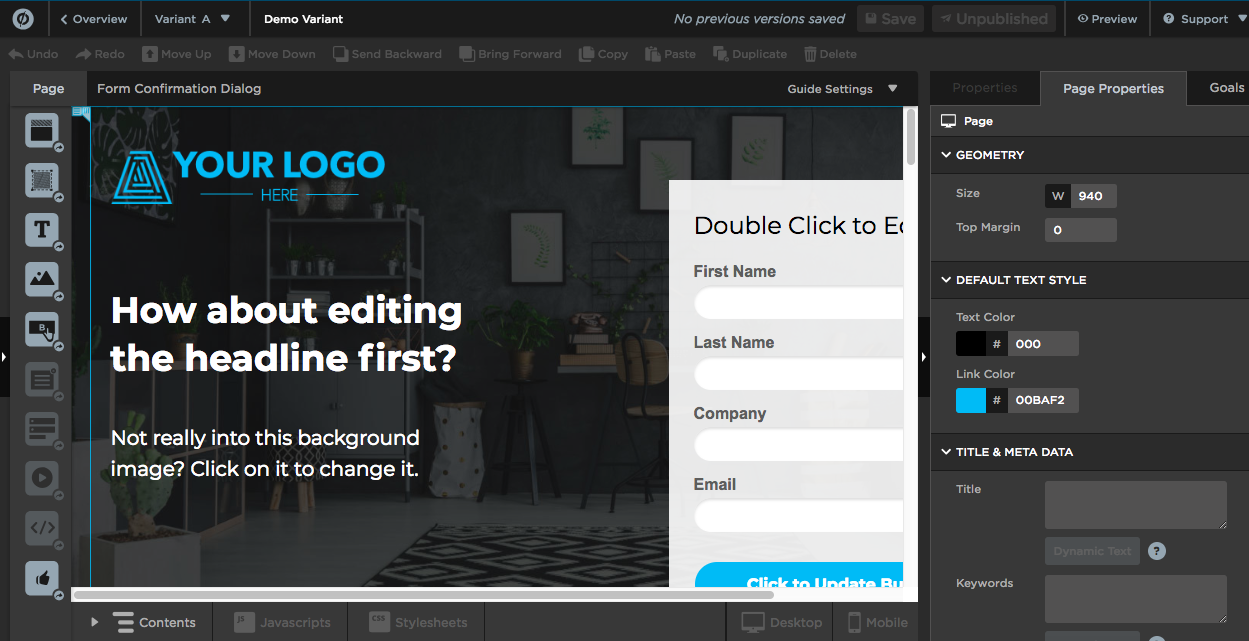
Created landing pages for your website pages with software like Unbounce
You can try the feature out with a free demo, and sign up for a free 30-day trial.
The thing to remember here is that the landing page you send users to has to match what was on the popup.
Don’t push a PPC audit in a popup if you’re going to send them to a page about your full-services, or try to cross-sell them on your social media services.
Just like a PPC ad you might run, make sure the theme and subject matter stays consistent, otherwise, your users will feel misled.
-
Create Website Popups Around Each Content Segment
One of the more common dilemmas with popups is figuring out which website pages to put them on.
So here’s what I recommend: look at each major content or product segment of your website, and create a popup that speaks to each.
Take my PPC audit example from above – that would be what I apply to all blog articles or website pages in the PPC segment of my site.
Additionally, you should look at your top 20 landing pages and create individual popups that relate to each of those pages.
To find those landing pages, you’ll need to look in Google Analytics.
Log in and navigate to your dashboard, then Behavior Data > Site Content > Landing Pages.
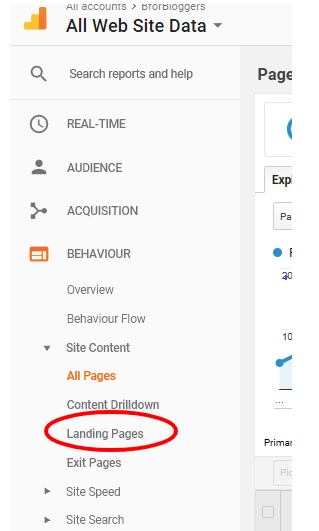
Create website popups for your top landing pages
The report pulled which show you which landing pages are generating the most traffic. These, again, are the ones you’ll build specialized popups.
Because these are the pages that see the most traffic, you don’t want to use the same popups you’re firing for your general content segments.
You’ll want more specialized website popup that relate to the specific content on that page.
So for example, if one of my content segments was social media, I would create a general popup that contained information about our social media management.
But, say my post on How to Be Found in Instagram Search was one of my top pages. I’d then want to create a new popup with information specific to my brand’s succes with Instagram strategy, and lead to more information.
Beyond that, it’s also a good idea to create a general website popup. This can fire if someone’s just visiting your homepage, about page, or other page not closely tied to one of your content segments.
Once you’ve created all your popups, make sure you’re running split tests on different elements.
Test variations like CTA, color scheme, timing, etc. to see which drives the most clicks and conversions on your site.
-
Have a Goal For Your Website Popup
When creating popups, make sure you’re doing so with a goal in mind.
A popup with no purpose doesn’t do you (or your visitors) any favors, so make sure you’ve thought through what you’re trying to accomplish with your strategy.
Are you trying to get more webinar signups? Do you want someone to subscribe to your email list? Do you want an actual purchase from your popup?
To determine the goal of individual popups, I like to look at the content of the page they’re firing on.
If the page relates specifically to a product or service, then your popup should be conversion focused.
So if someone’s looking at a pair of shoes on your site, you might want to show them a discount or free shipping popup to encourage them to convert.
If it’s a more general page, say, a blog post about digital marketing strategy for the new year, it’s a good opportunity to use a popup to capture emails or signups.
Wrapping Up Website Popups
When done correctly, website popups are a great way of increasing your online conversions.
And by following the steps outlined above, you’ll be well on your way to improving your lead generation.
